반응형
UILabel에는 아쉽게도 Padding을 적용 할 수 없습니다.
그래서 UILabel을 상속 받은 클래스에 Padding을 적용 할 수 있도록 처리를 해야 합니다.
Padding을 적용하는 방법에 대해서 알아보겠습다.
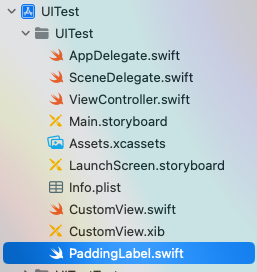
1. Xcode 에서 Swift 파일(PaddingLabel.swift)을 추가합니다.

2. PaddingLabel.swift에 아래의 코드를 작성합니다.
import UIKit

@IBDesignable class PaddingLabel: UILabel {

    @IBInspectable var topPadding: CGFloat = 0.0
    @IBInspectable var leftPadding: CGFloat = 0.0
    @IBInspectable var bottomPadding: CGFloat = 0.0
    @IBInspectable var rightPadding: CGFloat = 0.0

    convenience init(padding: UIEdgeInsets) {
        self.init()
        self.topPadding = padding.top
        self.leftPadding = padding.left
        self.bottomPadding = padding.bottom
        self.rightPadding = padding.right
    }

    override func drawText(in rect: CGRect) {
        let padding = UIEdgeInsets.init(top: topPadding, left: leftPadding, bottom: bottomPadding, right: rightPadding)
        super.drawText(in: rect.inset(by: padding))
    }

    override var intrinsicContentSize: CGSize {
        var contentSize = super.intrinsicContentSize
        contentSize.width += self.leftPadding + self.rightPadding
        contentSize.height += self.topPadding + self.bottomPadding
        return contentSize
    }

}
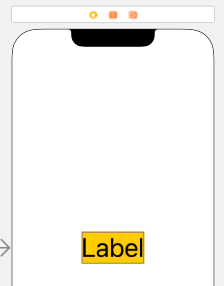
3. 스토리보드의 화면에 Label을 추가하고 시인성을 위해서 배경(Background)에 색을 넣습니다.

4. Label의 Custom Class 속성에 PaddingLabel 클래스를 지정합니다.

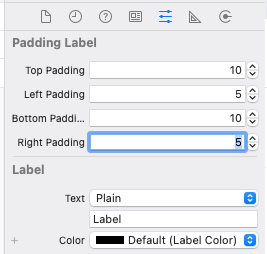
5. Attributes Inspector에 Padding 속성이 추가되어 보여지는데, 위/아래, 좌/우로 Padding 값을 입력하세요.

6. Xcode에서 앱을 실행하여 Padding이 적용된 것을 확인하세요.
(아쉽게도 스토리보드 화면에서 Padding 값이 잘 적용되지 않습니다.)
반응형
'iOS' 카테고리의 다른 글
| [iOS] xcode 프로젝트에 CocoaPods 사용하기 (0) | 2024.04.25 |
|---|---|
| iOS 상태바(Status Bar) 글자 색깔 밝게 변경하기 (0) | 2023.03.21 |
| iOS UITextField 비활성화(수정 못하게) 하고, 클리어 버튼은 활성화 시키기 (0) | 2023.03.02 |
| Xcode 14에서 Main 스토리보드 지정하기 (0) | 2023.02.08 |
| [iOS 앱 개발] Swift 파일 쓰기 & 읽기 (0) | 2022.10.12 |


댓글